Barbari is a traditional Persian flatbread known for its crispy crust and soft, fluffy interior. Whether served with cheese, herbs, or a hearty stew, this bread is a staple in Persian households.

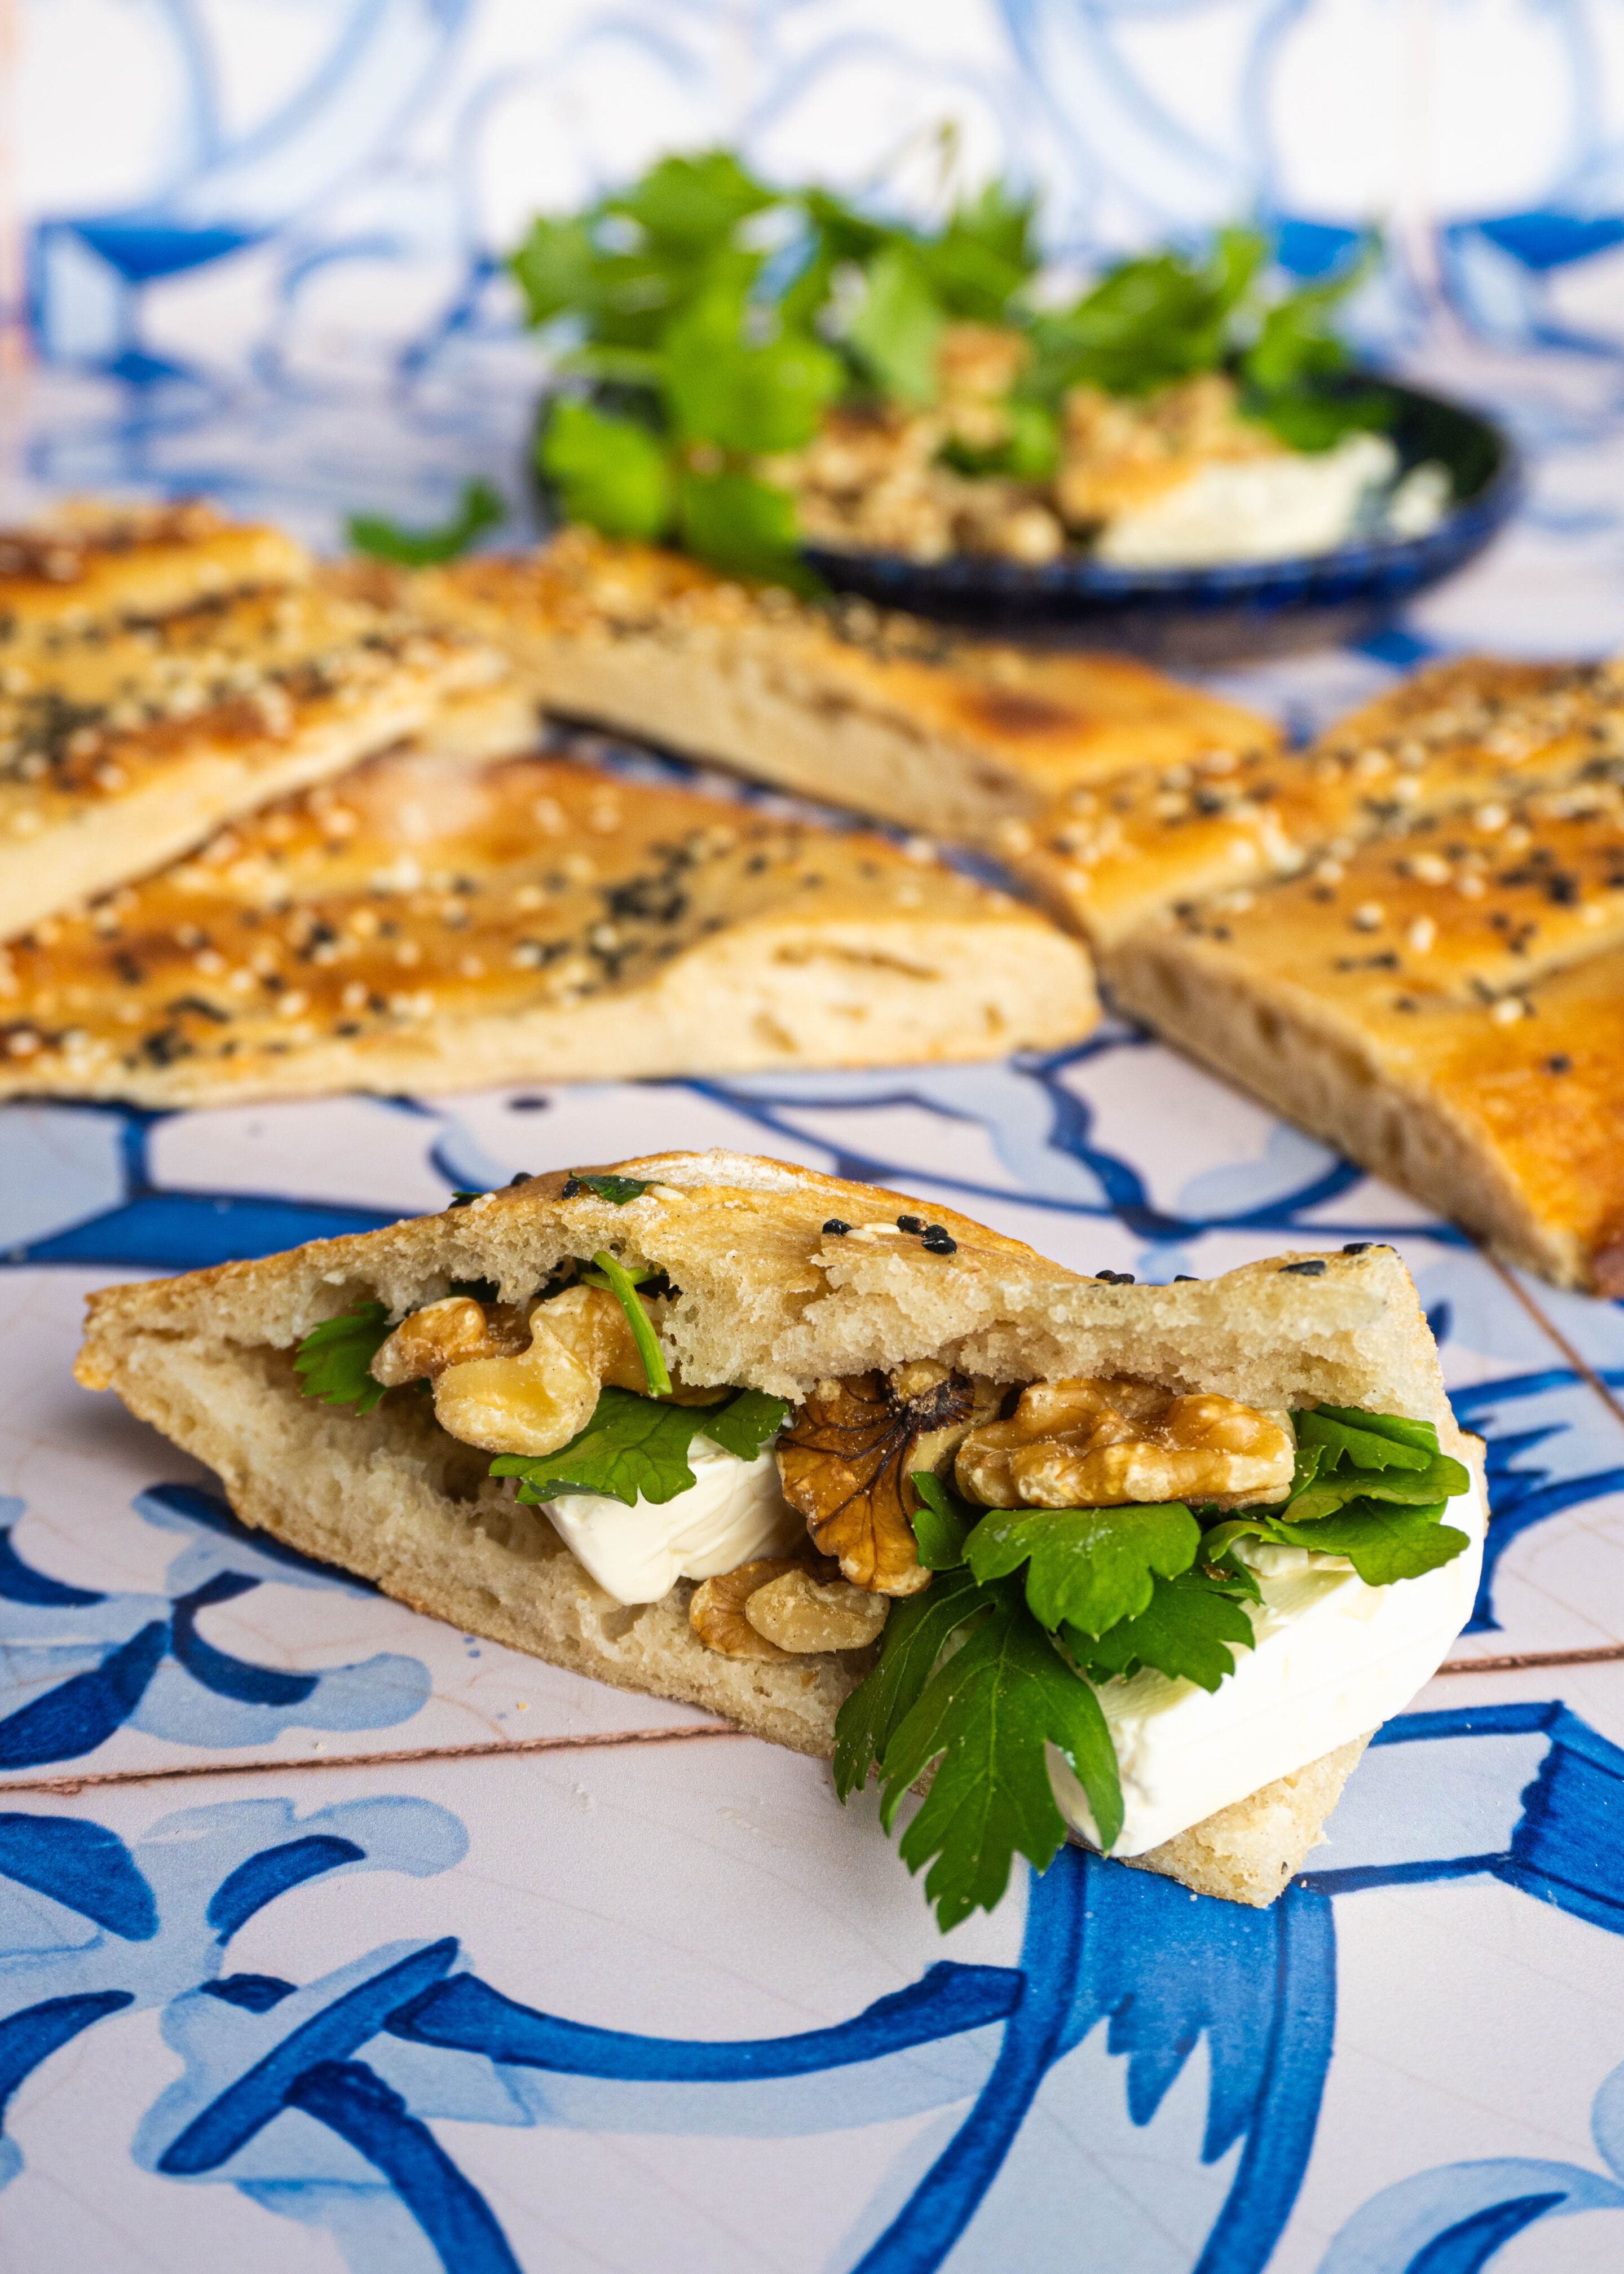
We just love it in my household because it’s the perfect grab and go snack, as well as being a delightful addition to the dinner table. It doesn’t matter if I’m scooping up dips and oils or grabbing a snack with some cheese (feta to be specific) and fresh Mint and Parsley, Barbari is amazing!
A Little Bit About Barbari Bread
Also known as Naan Barbari or Noone Barbari, this Persian flatbread is adored for its crispy crust and soft, fluffy centre. It’s a breakfast staple in Iran, often served with feta cheese, fresh herbs, and sweet jams.
Its unique grooves and golden glaze give it a distinctive look and texture, making it instantly recognisable. The grooves are also ideal for scooping up your dip of choice which is what makes it so popular in my household!
The word ‘Barbari’ traces back to the Barbar tribe, who were believed to have introduced this bread to Persian cuisine. Today, it’s loved worldwide for its delicious simplicity, especially in my kitchen!
My Favourite Ways to Enjoy Barbari
There’s no wrong way to eat Barbari! Traditionally, it’s served fresh from the oven with a spread of feta, herbs like mint, parsley, and basil, and an overly sweet hot cup of chai. I love to dip it in olive oil and za’atar or Kashke Bademjan for a Middle Eastern twist or use to make the best ‘loghme’ (bite) with Kotlet and fresh salad.
It’s also fantastic for sandwiches, especially with grilled vegetables or roasted lamb. My husband has even been known to make a “leftover sandwich” which is exactly how it sounds! Once you try it, you’ll find endless ways to enjoy this versatile bread!
Toppings for Barbari
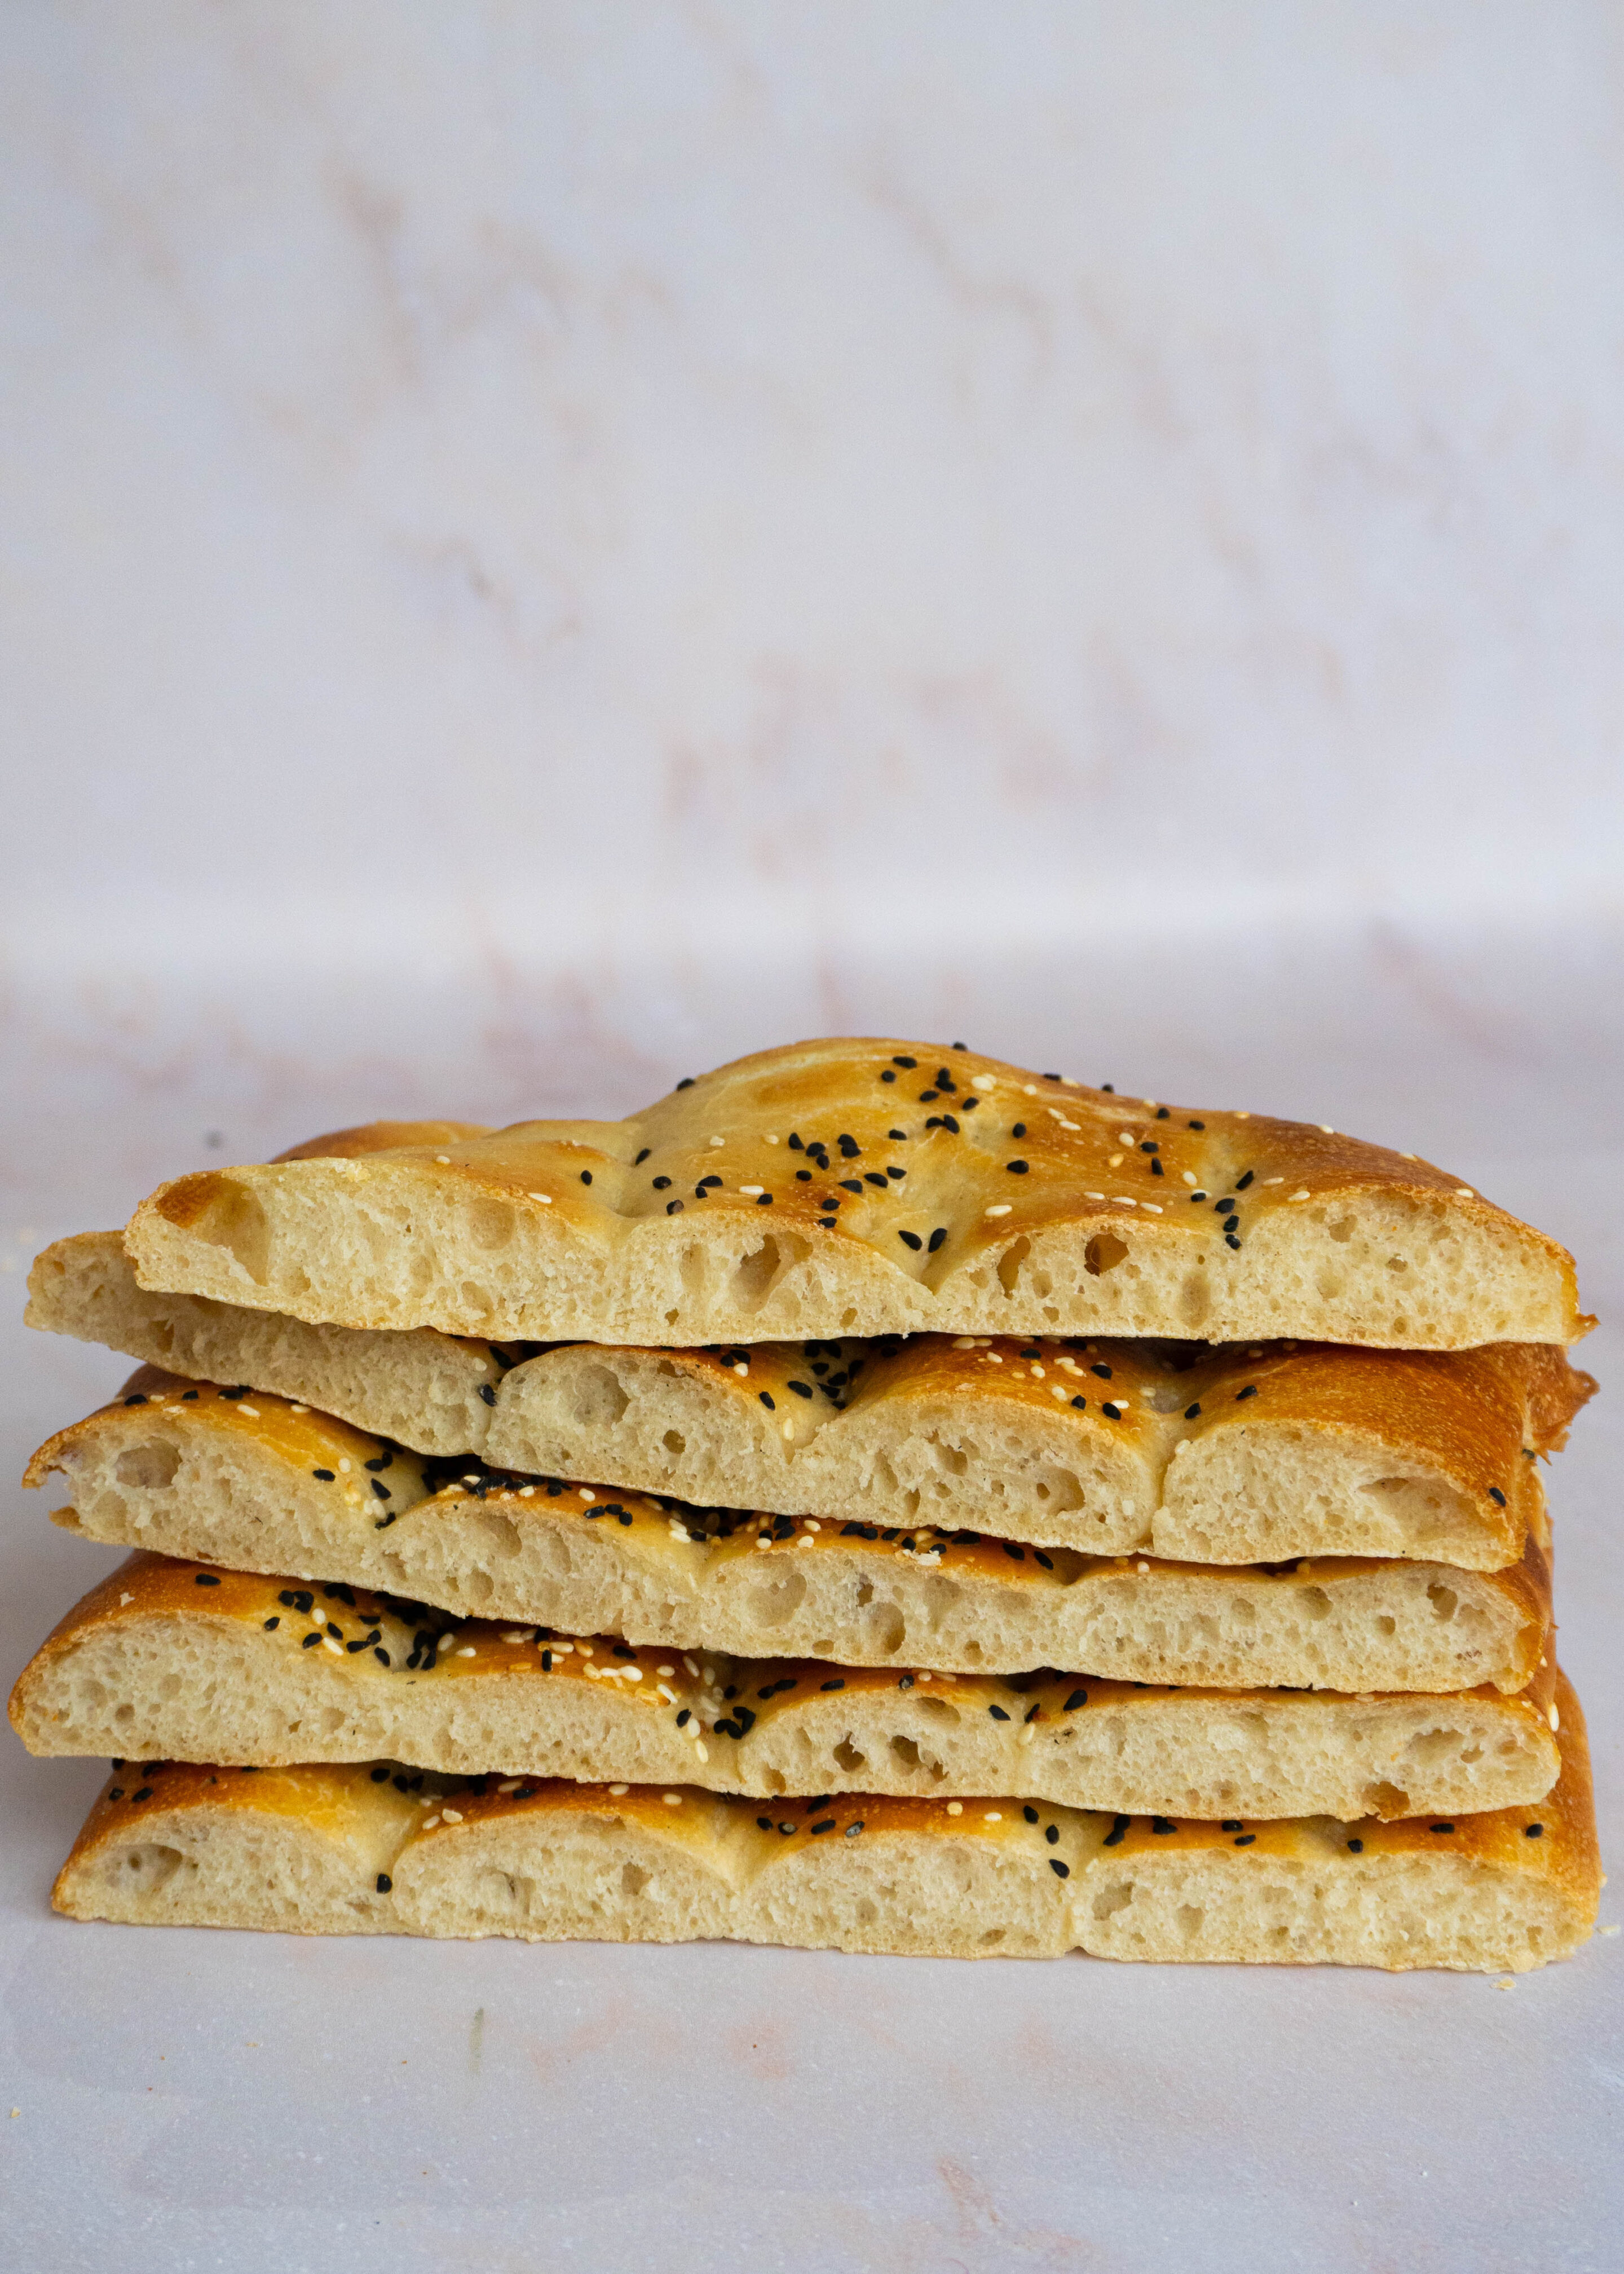
There are so many different toppings you can sprinkle over your Barbari for both aesthetic and taste reasons. For this recipe I’ll be sticking to tradition and enjoying a handful of sesame seeds and nigella seeds but there are so many other delicious options you can try.
Some other seeds you might enjoy on your Barbari are black caraway seeds or even pumpkin seeds. However, you can really experiment with anything left in your pantry.
I have seen friends put cheese or even sun dried tomatoes on top of their Barbari for a Mediterrenean twist that makes an absolutely delicious starter, especially with oil and vinegar for dipping.
If you’d rather make it into a sweet snack you could even add chopped fruits, chocolate pieces, and walnuts. This Barbari recipe is a handy base you can use as a vessel for some of your favourite toppings!
The Ingredients for Barbari
The beauty of Barbari lies in its simplicity. Made with just flour, water, yeast, salt, sugar, and a touch of oil, it’s incredible how these basic ingredients transform into something so delicious.
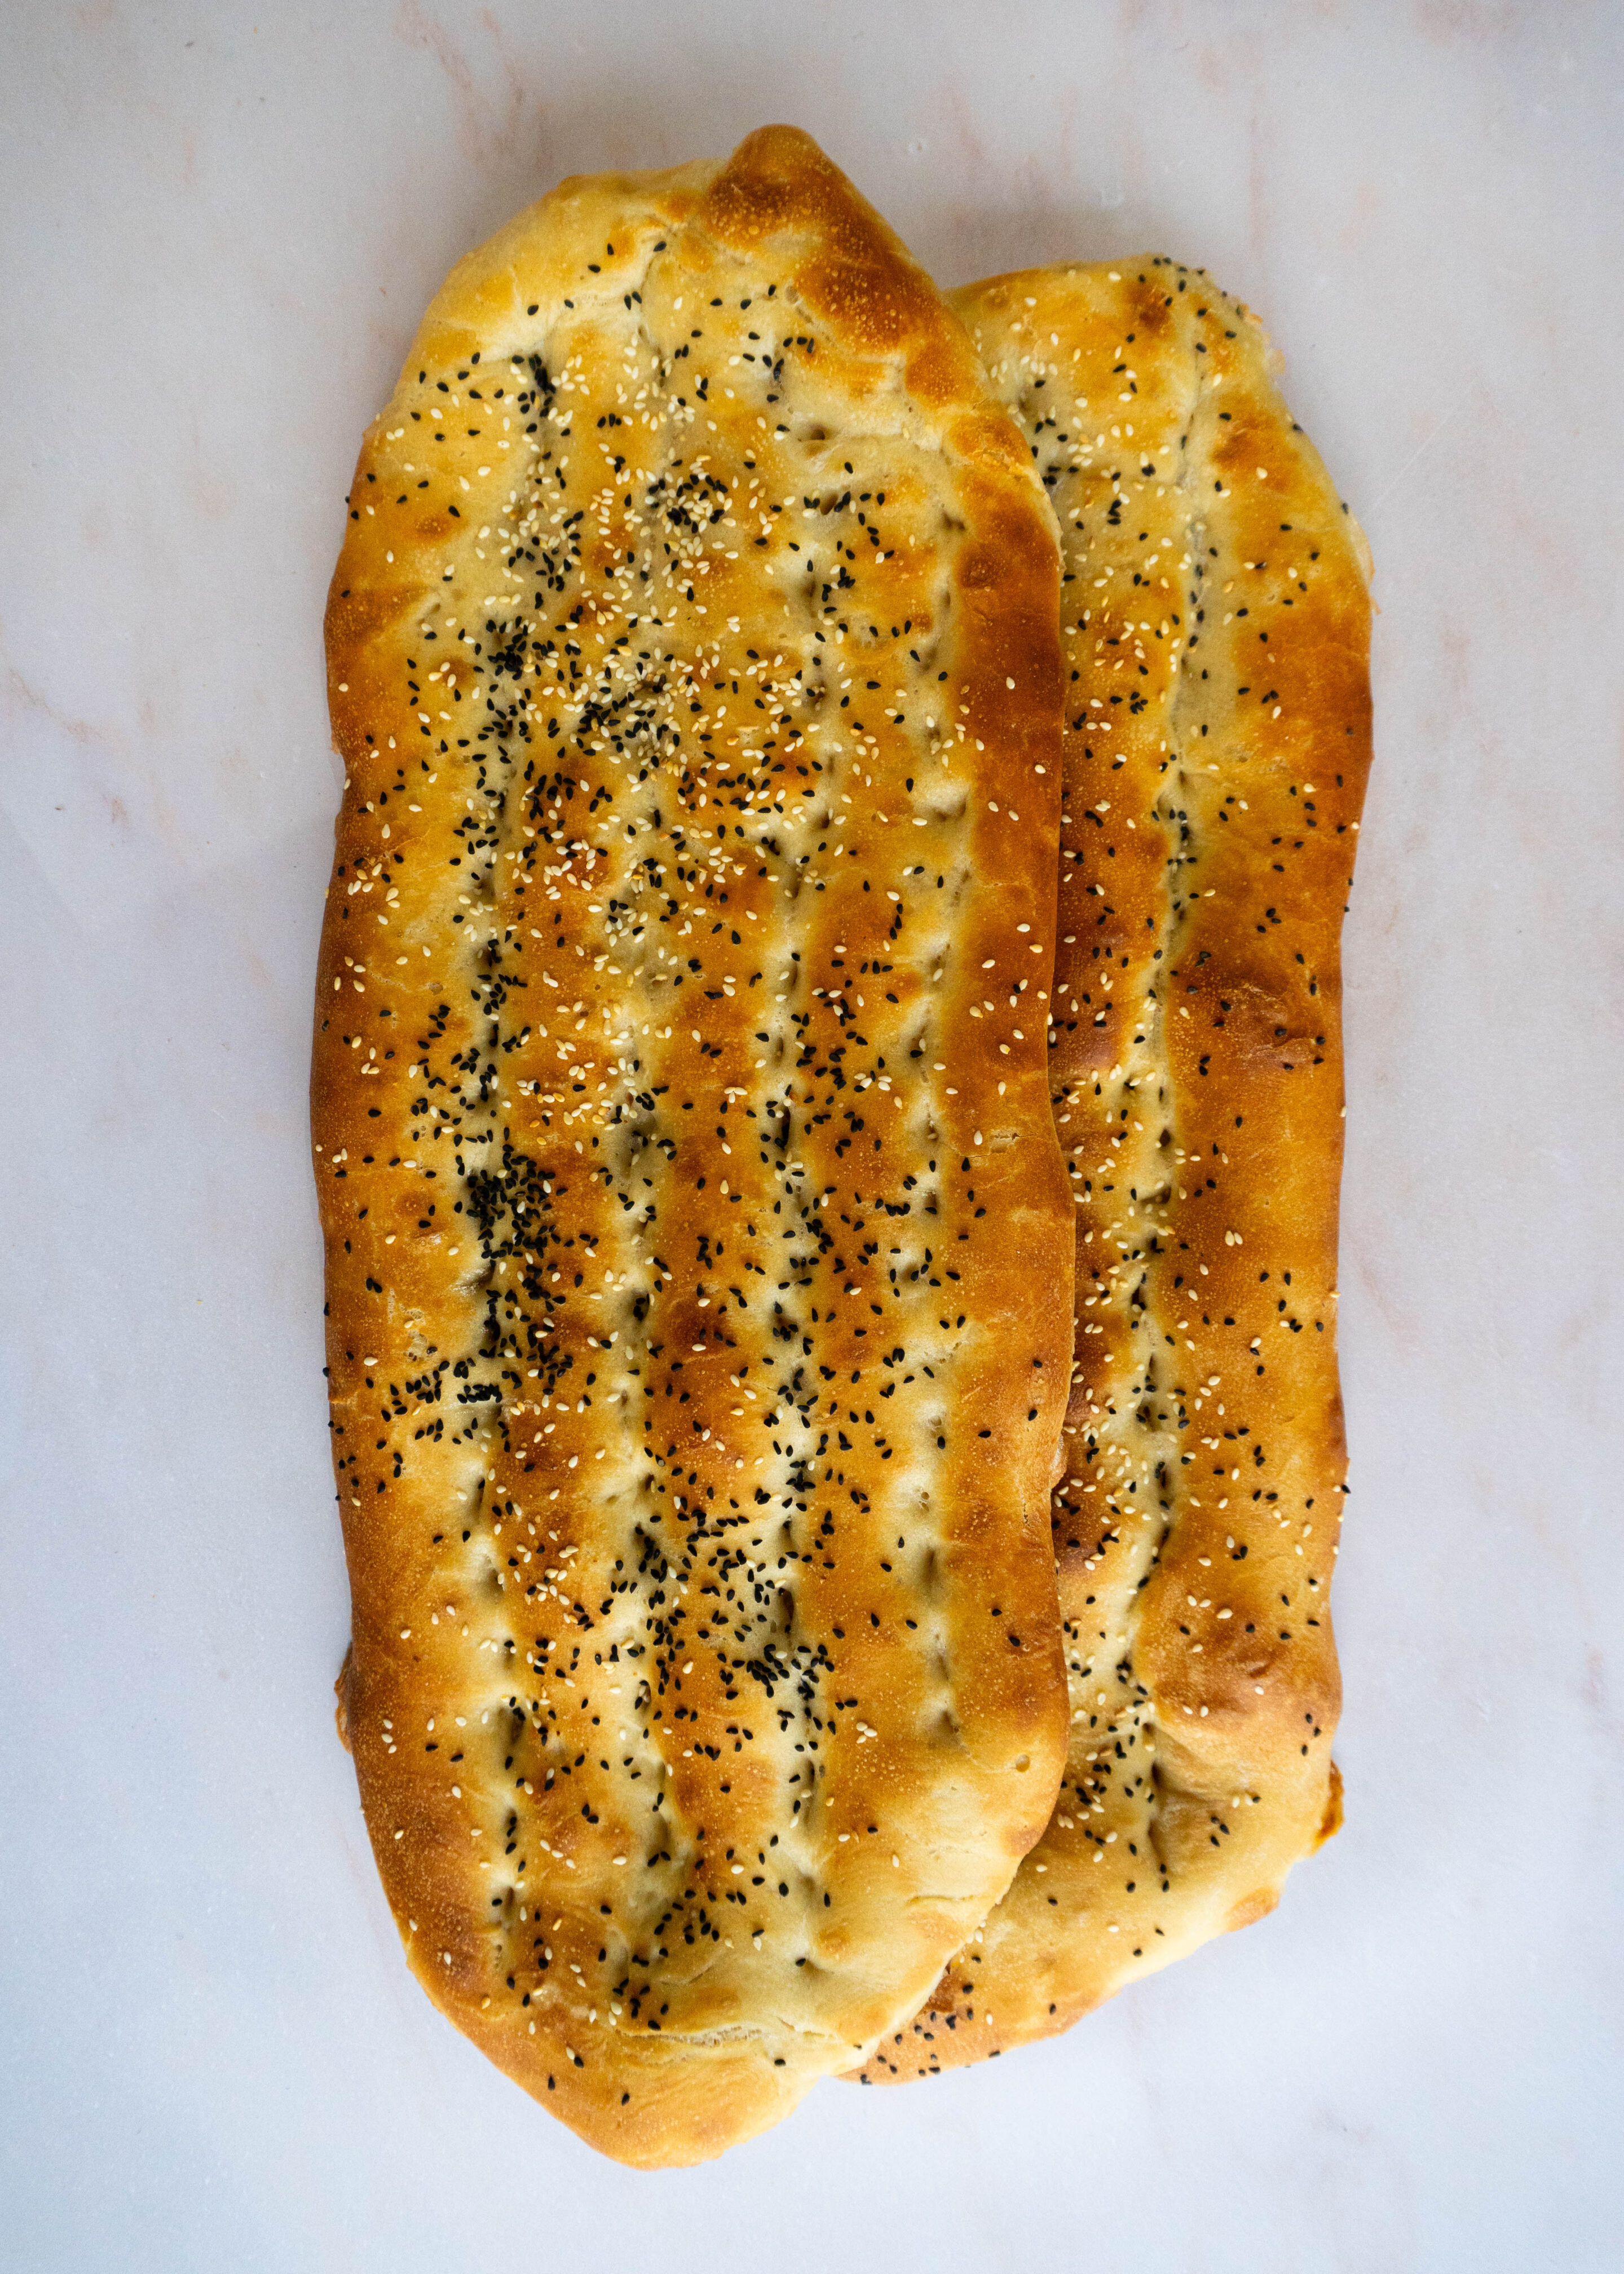
Roomal: The secret lies in the roomal, a flour-based glaze brushed on before baking, giving the bread its signature golden crust and shiny finish.
Sesame or Nigella Seeds: I love to sprinkle sesame and nigella seeds on top for extra flavour and crunch, but you can keep it plain or experiment with other toppings like poppy seeds or herbs.
I often let my children sprinkle on the seeds so they feel involved in the process. I always think that watching dough rise is so magical for little ones and it’s no wonder that bread of any kind is one of their favourite things to help me make now.
Lukewarm water: Emphasis on the lukewarm here! Too cold and your yeast won’t activate but too hot and it’ll die! You want that goldilocks temperature where it’s just right for the magic to happen!
Step by Step:
- Mix 100ml of lukewarm water (from the total 420g), sugar, and yeast in a small bowl. Stir and let it sit for about 5–10 minutes until it becomes frothy.
- In a large bowl, mix the flour and salt. Gradually add the yeast mixture and the rest of the water while stirring.
- Add the oil and knead the dough until it’s soft, smooth, and slightly sticky. This should take about 10 minutes by hand or 6-8 minutes with a stand mixer.
- Place the dough in a lightly oiled bowl, cover it with a damp cloth, and let it rise in a warm spot for about 1-1.5 hours or until it doubles in size.
- In a small saucepan, whisk together the flour, sugar, and water for the glaze.
- Heat the mixture over medium heat, stirring constantly, until it thickens into a smooth paste.
- Set aside and let it cool to room temperature.
- Preheat your oven to 250°C (480°F) with a baking stone or tray inside.
- Punch down the risen dough and divide it into two or three equal portions, depending on how large you want each bread.
- Shape each portion into a long oval or rectangular loaf.
- Place the shaped loaves on parchment paper and gently stretch them to elongate.
- Allow to rest for 30 minutes, this helps the dough rise a little and when creating the grooves later your fingers won’t stick to the dough.
- Using your fingers, create grooves along the surface. Brush the tops generously with the roomal glaze.
- Sprinkle sesame seeds, nigella seeds, or any toppings you like over the loaves.
- Carefully slide the parchment paper with the dough onto the preheated baking stone or tray.
- Bake for 18-22 minutes, or until the bread turns golden brown with a crisp crust.

Frequently Asked Questions
1. Can I use different types of flour?
Yes, you can! While bread flour is best for its higher protein content, you can use all-purpose flour if that’s what you have on hand. For a nuttier flavour, you can also experiment with whole wheat flour, but you may need to adjust the water amount to get the right dough consistency.
2. Can I freeze Barbari?
Absolutely! Barbari freezes beautifully. Just let the loaves cool completely, then wrap them tightly in plastic wrap and foil before freezing. When you’re ready to eat, pop them in a preheated oven for a few minutes to regain that perfect crunch.
3. Can I make the dough in advance?
Yes, you can prepare the dough a day ahead and let it rise slowly in the fridge. This slow fermentation enhances the flavour, giving the bread a slightly tangy taste. Just remember to bring it to room temperature before shaping and baking.

I’d love to hear how your Barbari turned out! Did you keep it traditional or try some new toppings? Let me know in the comments below or tag me on Pinterest and Instagram, I love seeing your creations! And if you have any questions, feel free to ask. Happy baking!
Love, Nelly 🙂
More Beautiful Bakes
- Bechamel Pasta Bake (Macarona Bechamel)
- Super Easy Sourdough Pita Bread
- Delicious Fig and Almond Cake
- Easy Sourdough Banana Bread Muffins
- Pistachio Rose Baklava Cake


My Easy Traditional Barbari Recipe
Ingredients
For the Roomal (Glaze)
Optional Toppings
Instructions
-
Mix 100ml of lukewarm water (from the total 420g), sugar, and yeast in a small bowl. Stir and let it sit for about 5–10 minutes until it becomes frothy.
-
In a large bowl, mix the flour and salt. Gradually add the yeast mixture and the rest of the water while stirring.
-
Add the oil and knead the dough until it’s soft, smooth, and slightly sticky. This should take about 10 minutes by hand or 6-8 minutes with a stand mixer.
-
Place the dough in a lightly oiled bowl, cover it with a damp cloth or cling film and let it rise in a warm spot for about 1-1.5 hours or until it doubles in size.
-
In a small saucepan, whisk together the flour, sugar, and water for the glaze.
-
Heat the mixture over medium heat, stirring constantly, until it thickens into a smooth paste.
-
Set aside and let it cool to room temperature.
-
Preheat your oven to 250°C (480°F) with a baking stone or tray inside.
-
Punch down the risen dough and divide it into two or three equal portions, depending on how large you want the loaves.
-
Shape each portion into a long oval or rectangular loaf.
-
Place the shaped loaves on parchment paper and gently stretch them to elongate. Then set aside to rest for 20-230 minutes.
-
Using your fingers, create grooves along the surface. Brush the tops generously with the roomal glaze.
-
Sprinkle sesame seeds, nigella seeds, or any toppings you like over the loaves.
-
Let the shaped dough rest for about 15-20 minutes to puff up slightly.
-
Carefully slide the parchment paper with the dough onto the preheated baking stone or tray.
-
Bake for 18-22 minutes, or until the bread turns golden brown with a crisp crust.

Looks absolutely delicious!