Welcome to the heart of my kitchen, where tradition and love blend to create something truly special. Today, I’m excited to share with you a cherished family recipe that has been passed down through generations – Mama’s Strawberry Jam. This homemade strawberry jam is not just a spread for your morning toast; it’s a sweet reminder of my childhood and the warmth of my mother’s kitchen.
A Taste of My Childhood
The Story Behind Mama’s Strawberry Jam Recipe
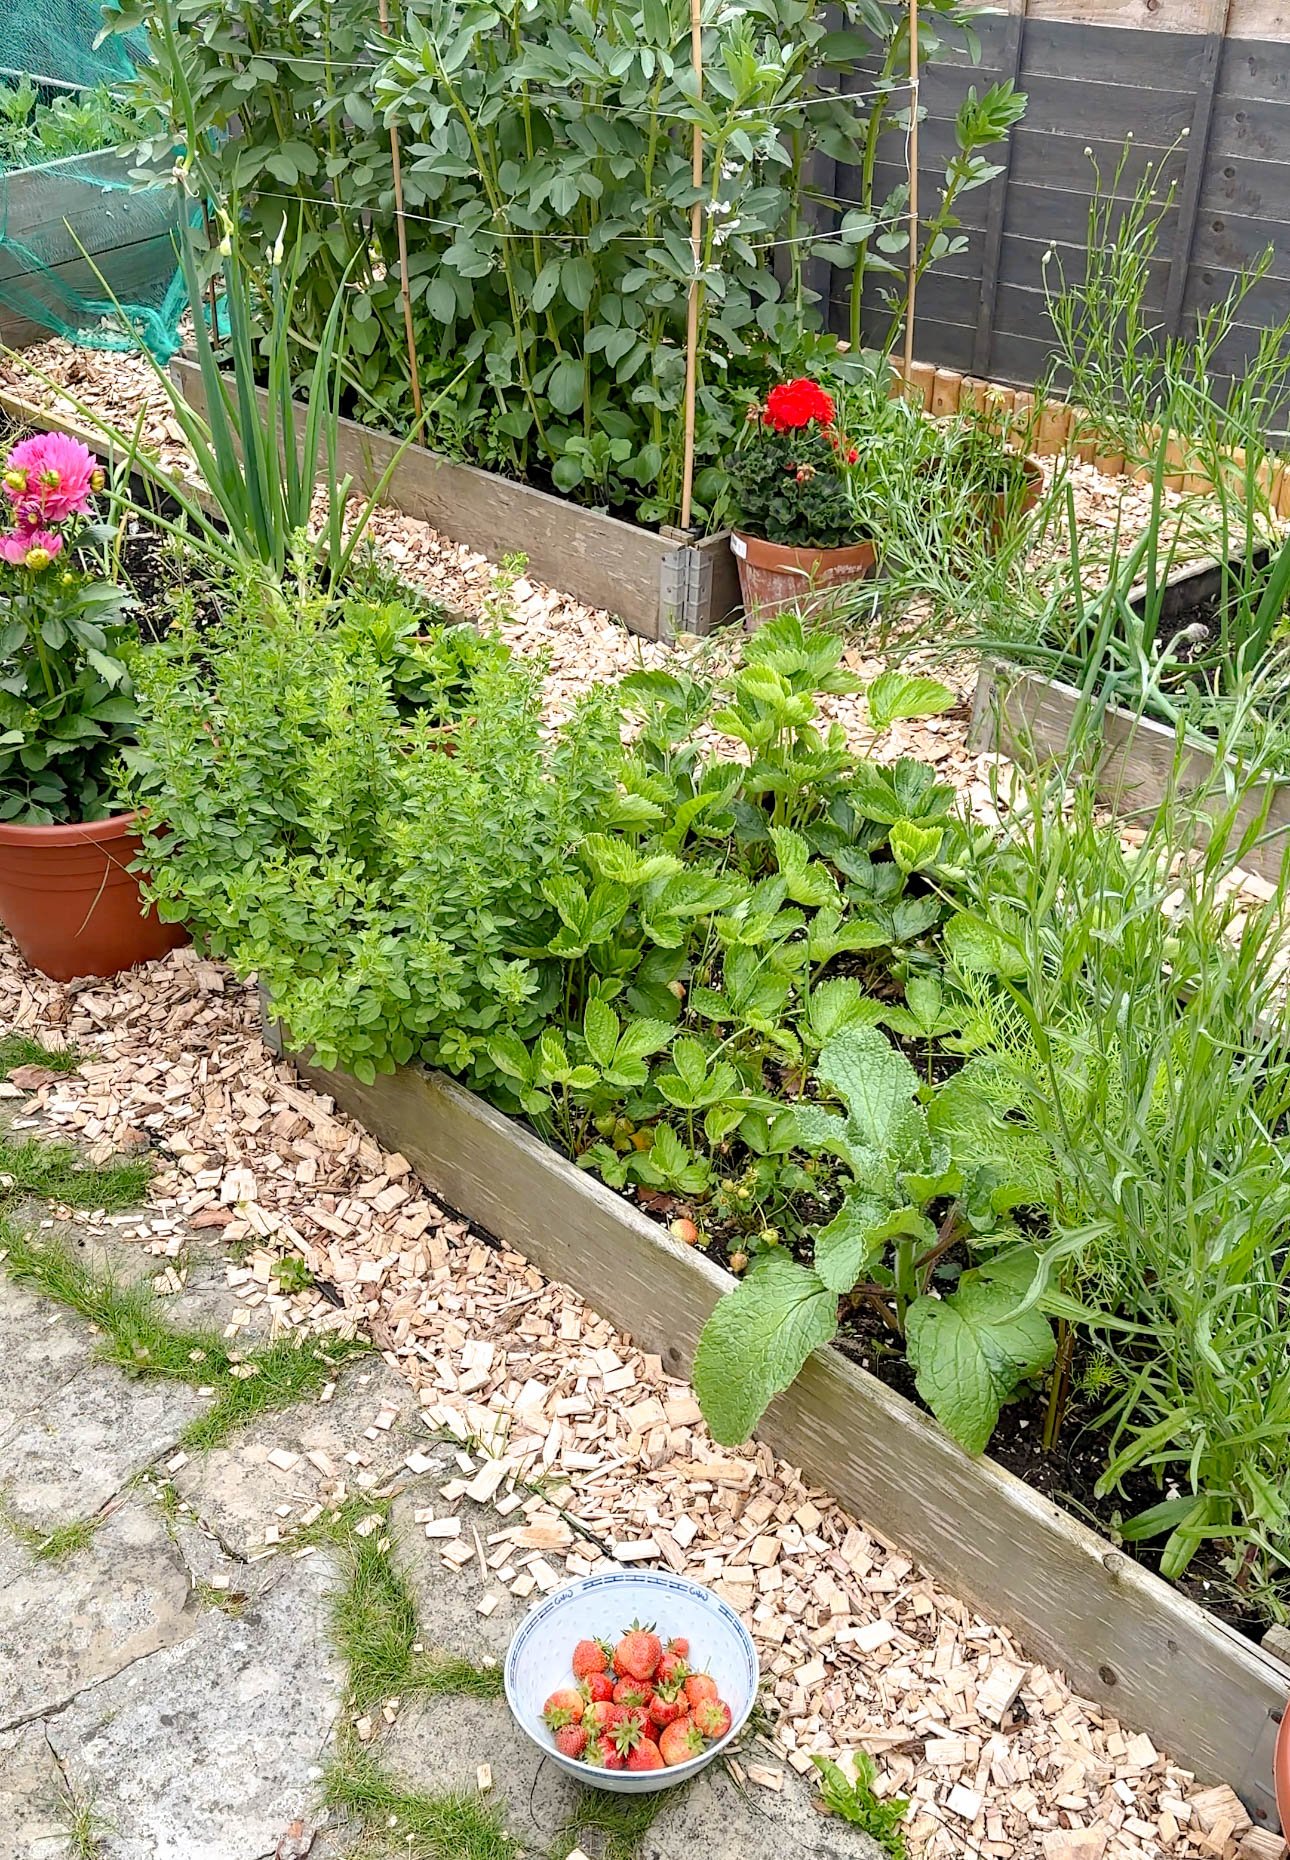
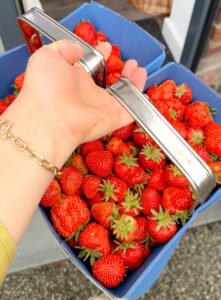
Growing up, summers were synonymous with strawberry picking. My sister and I would spend hours in the strawberry fields near us, filling our baskets to the brim. We would fill our bellies to the brim too while picking them. The anticipation of the jam-making process was almost as sweet as the strawberries themselves. Though after the process of picking the strawberries the rest is history to us.
My mother would take over and transform those fresh, juicy berries into a delicious, vibrant Strawberry Jam that we would enjoy all year round. In fact, I rarely remember her buying jam from the store. Mama made and still makes jam with all kinds of fruits, some of the other family recipes passed down from my grandmothers include; Sour orange blossoms (Bahar Narenj) and Citrus Peel Jam. This recipe is a homage to those memories and a celebration of simple, homemade goodness.
The Importance of Jam Making
Jam making is an art that goes beyond preserving fruit; it’s about capturing the essence of seasons and the memories associated with them. Using sugar and lemon juice in the right proportions is crucial to prevent crystallization and ensure a smooth, spreadable texture. While pectin is often used to help jam set, it’s not necessary for a good homemade jam. The natural pectin in fruits, especially strawberries, combined with the acidity of lemon juice, usually provides a perfect set without additional pectin. Plus, making strawberry jam without pectin allows for a purer, more intense fruit flavour.
A Refreshing Twist: Strawberry Syrup
One delightful byproduct of making strawberry jam is the syrup that forms during cooking. Before the jam sets completely, you can siphon off some of the liquid to create a refreshing summer drink. Simply mix the strawberry syrup with cold water and a splash of lemon juice, serve over ice, and enjoy a cool, fruity beverage that’s perfect for hot days.
Enjoying Jam as Turkish Iranians
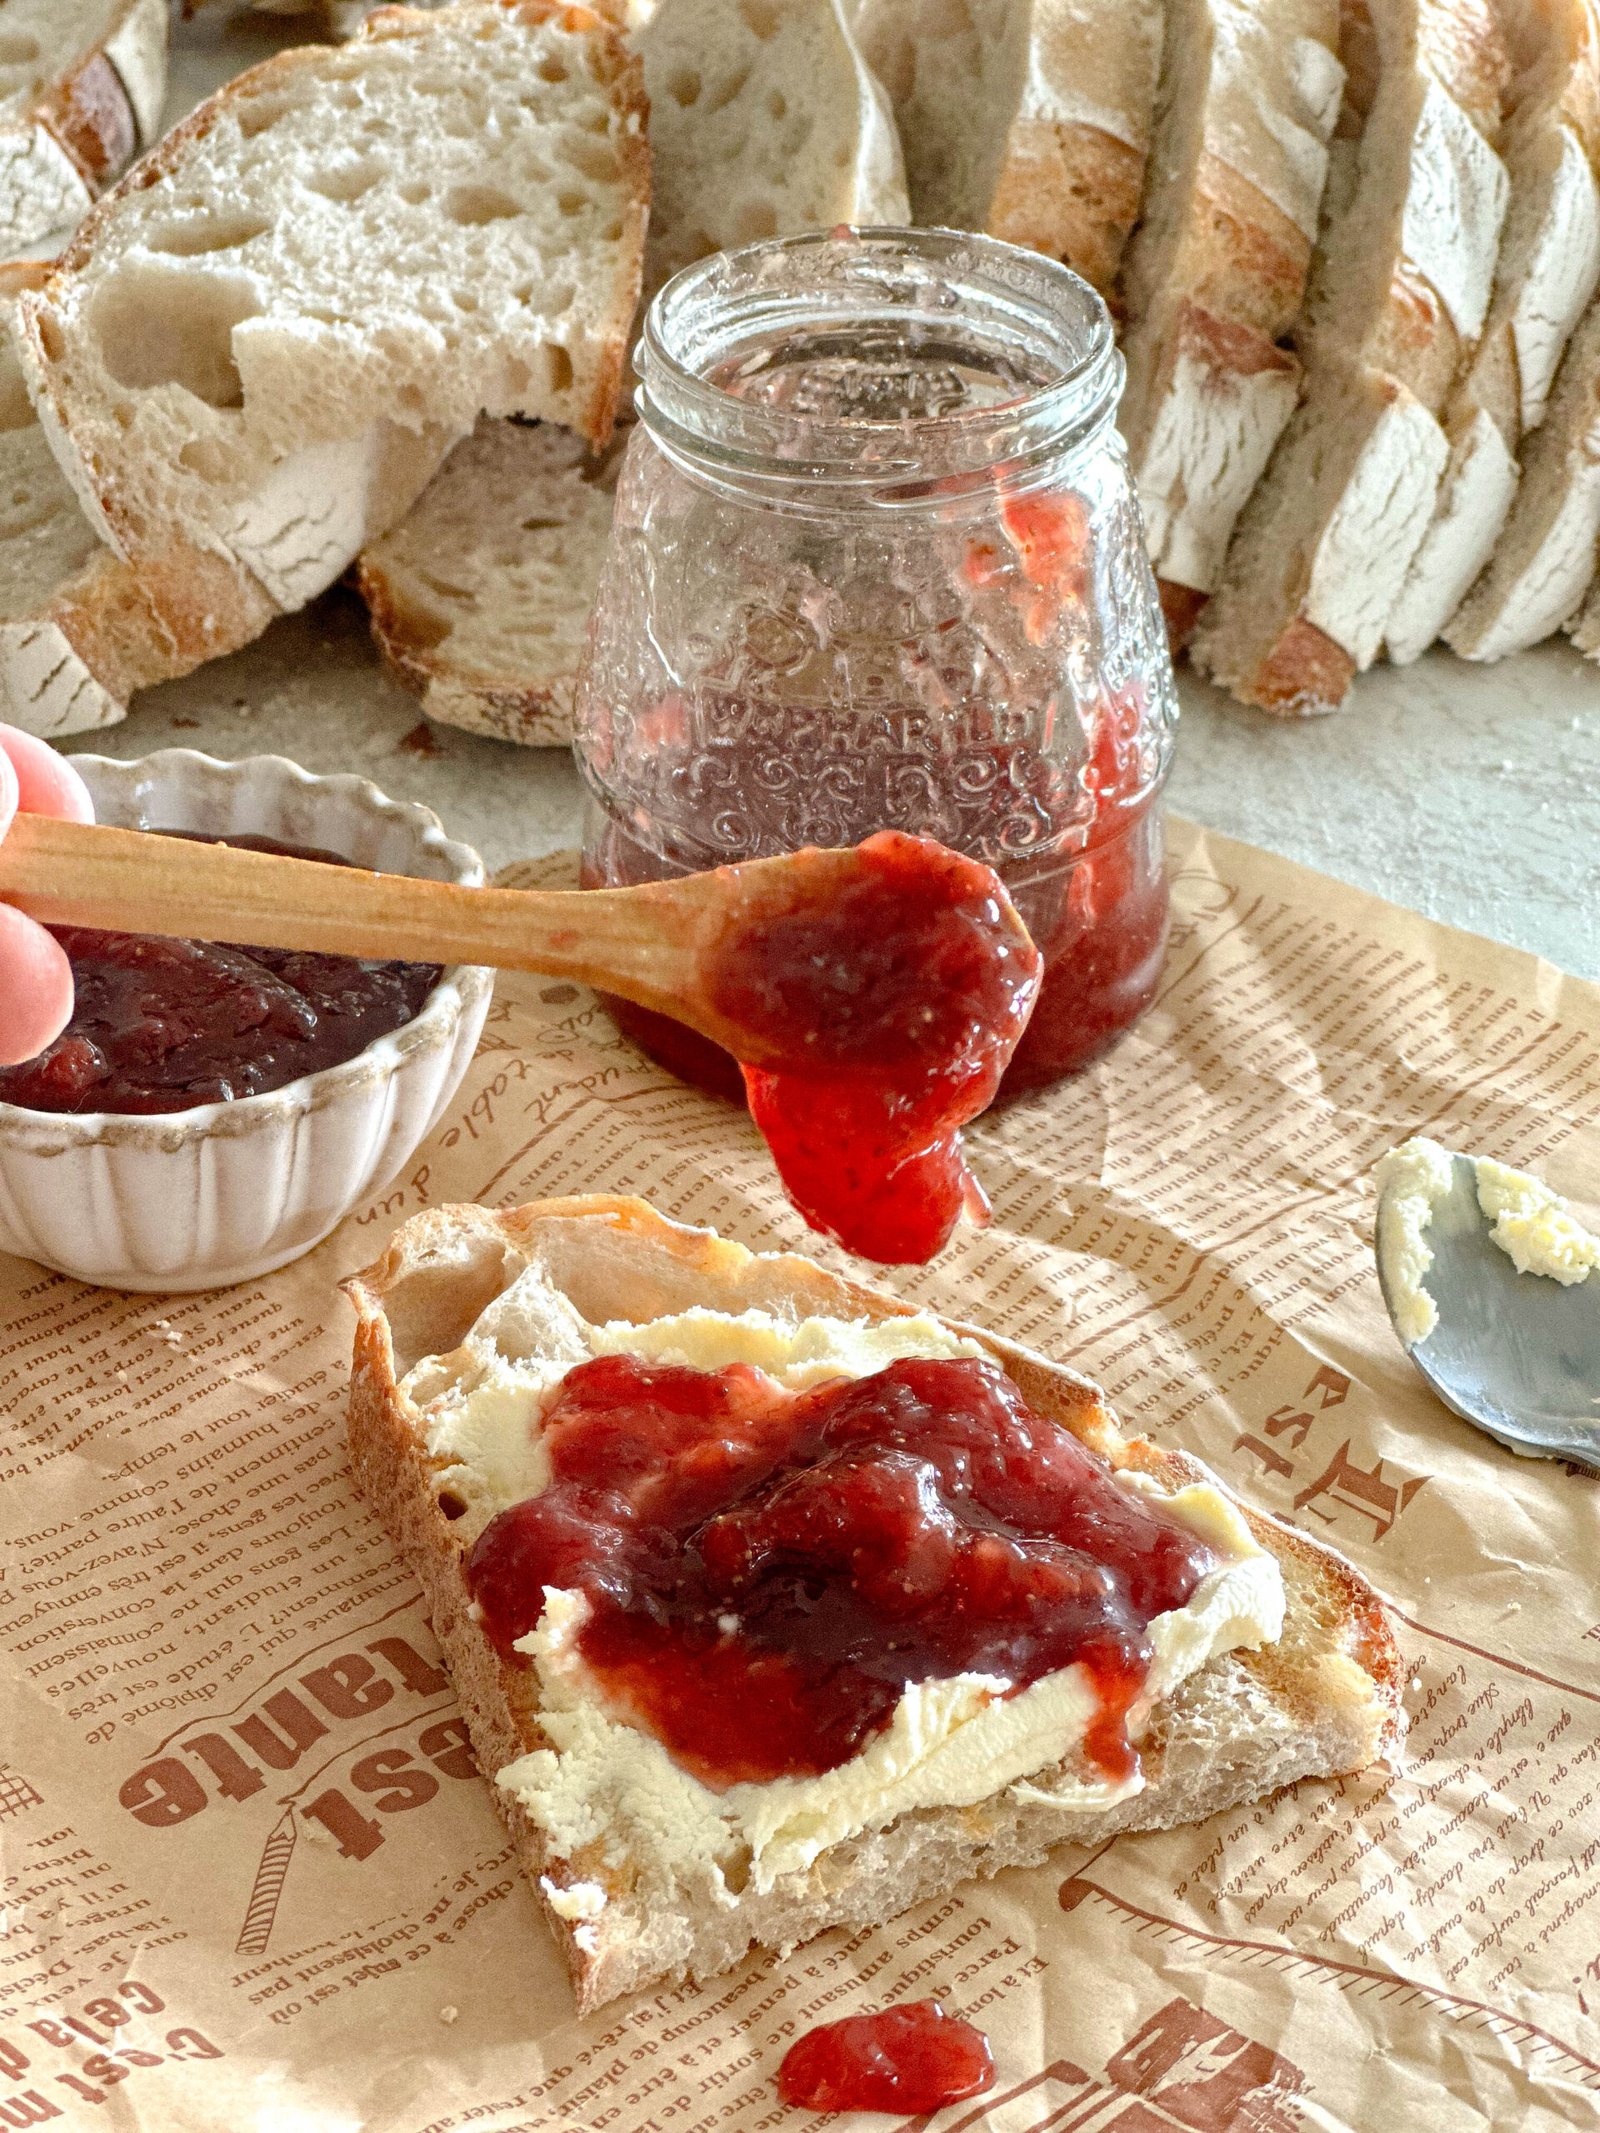
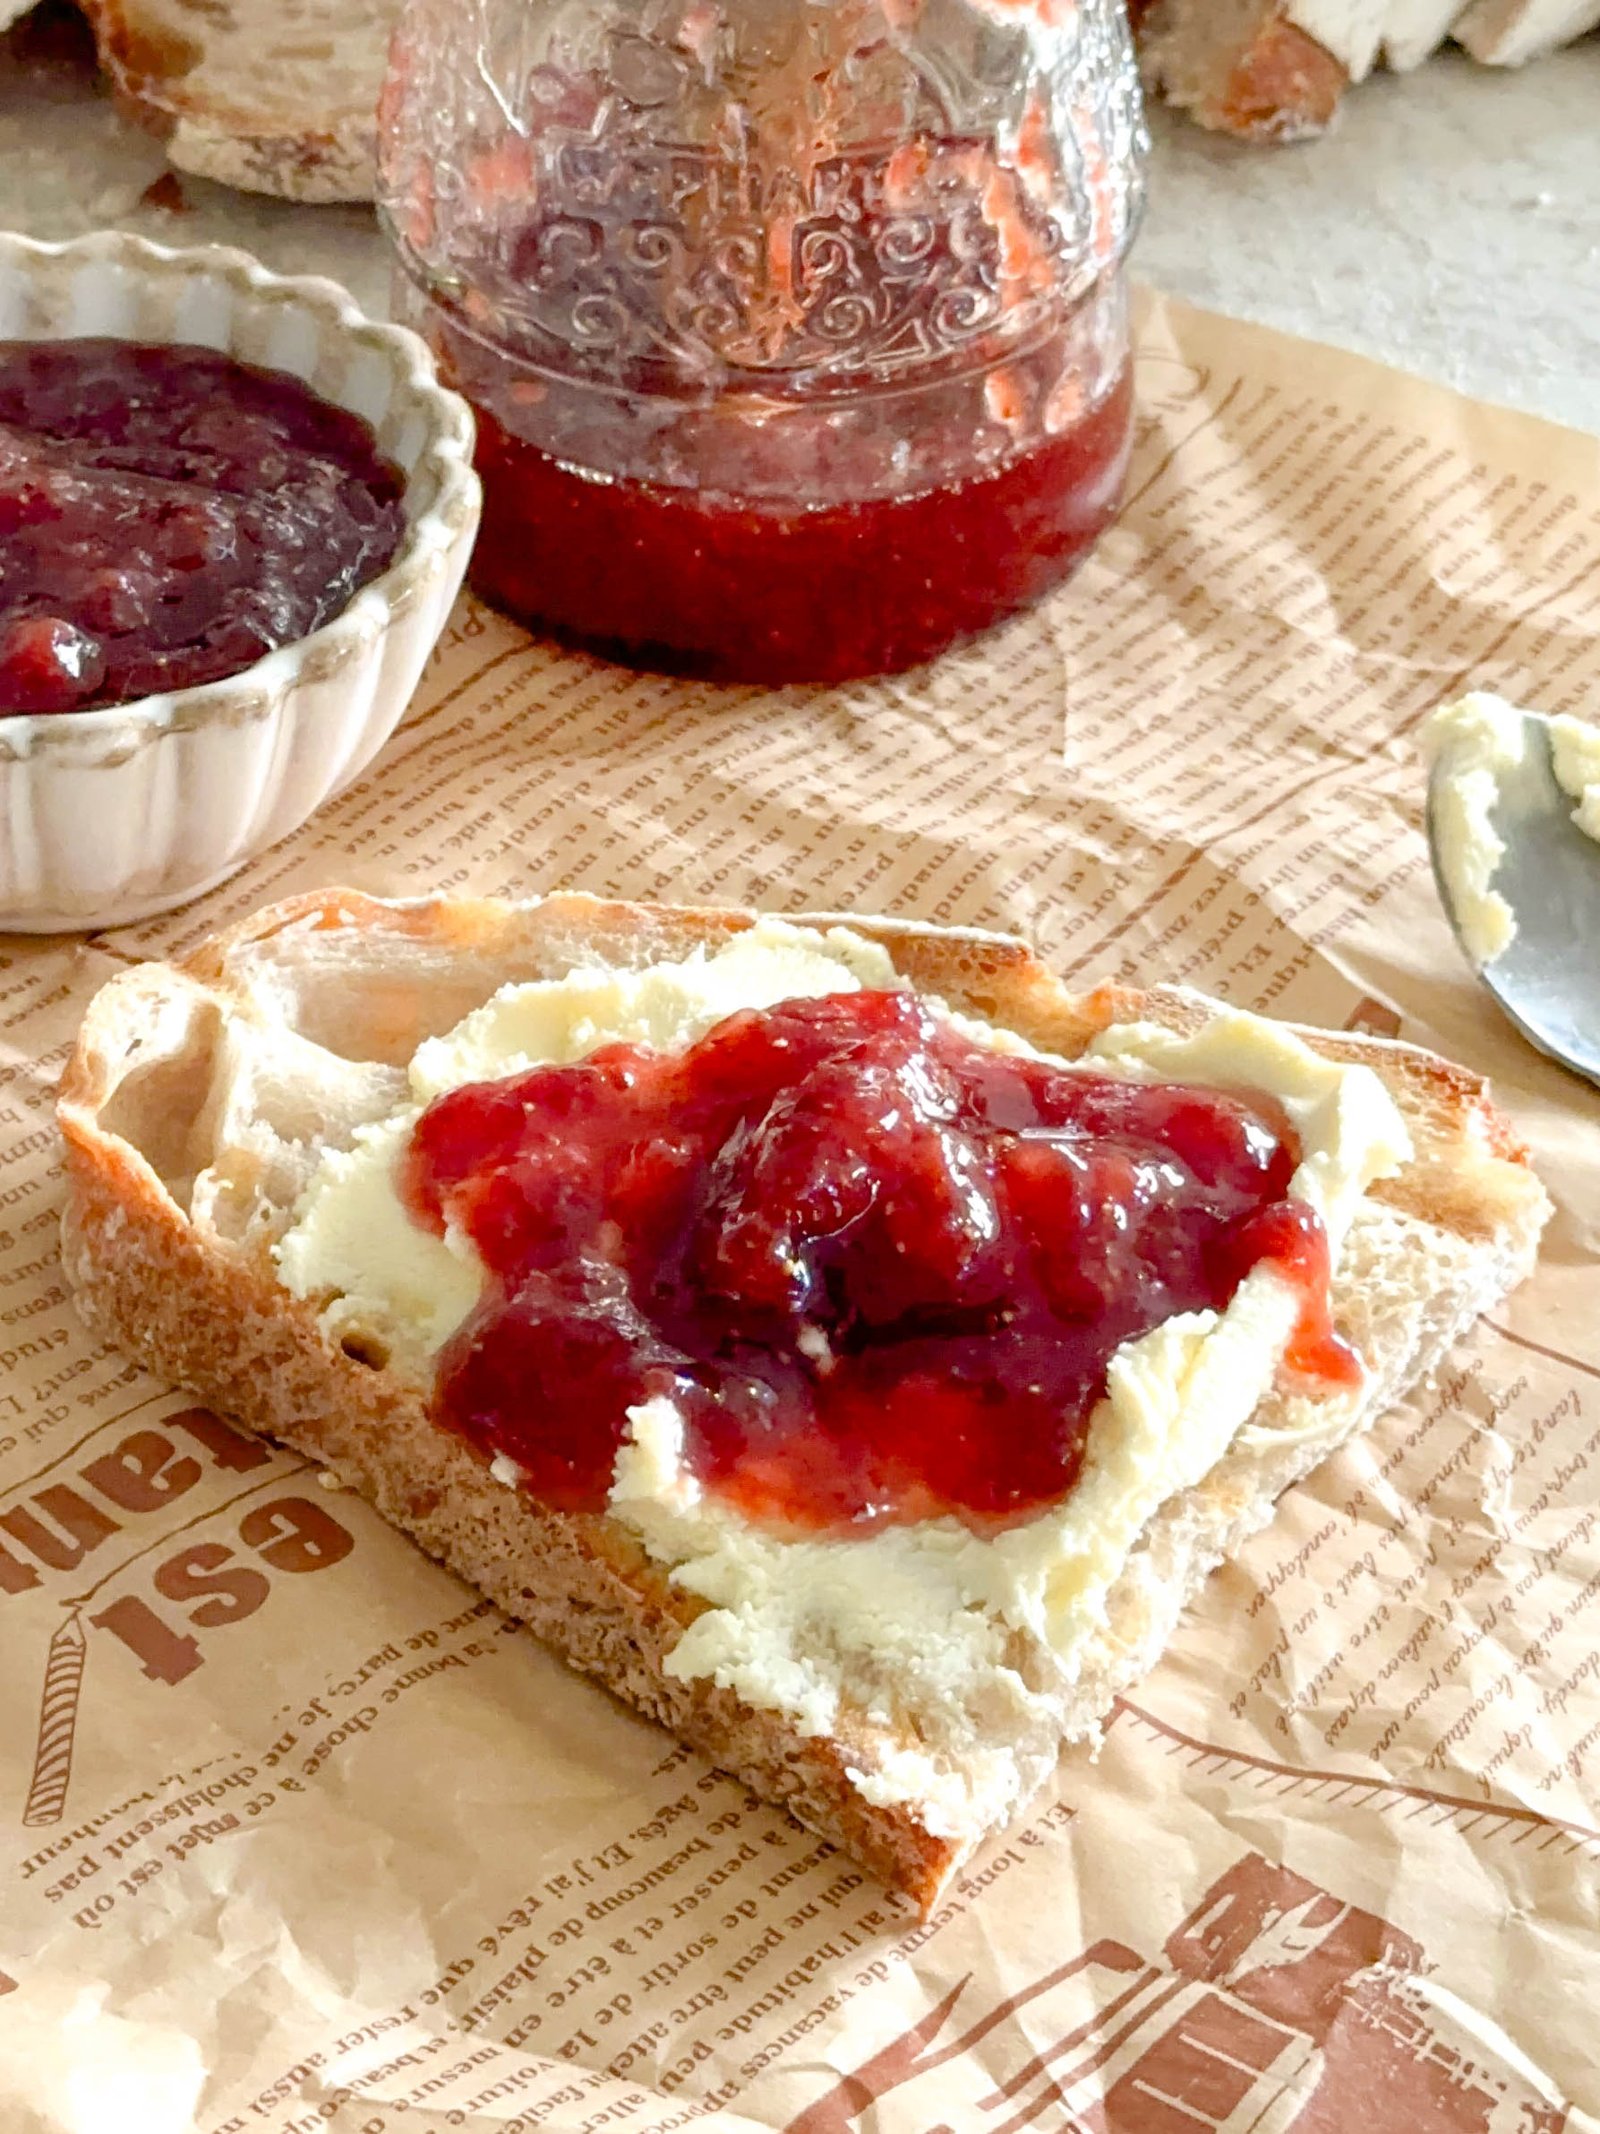
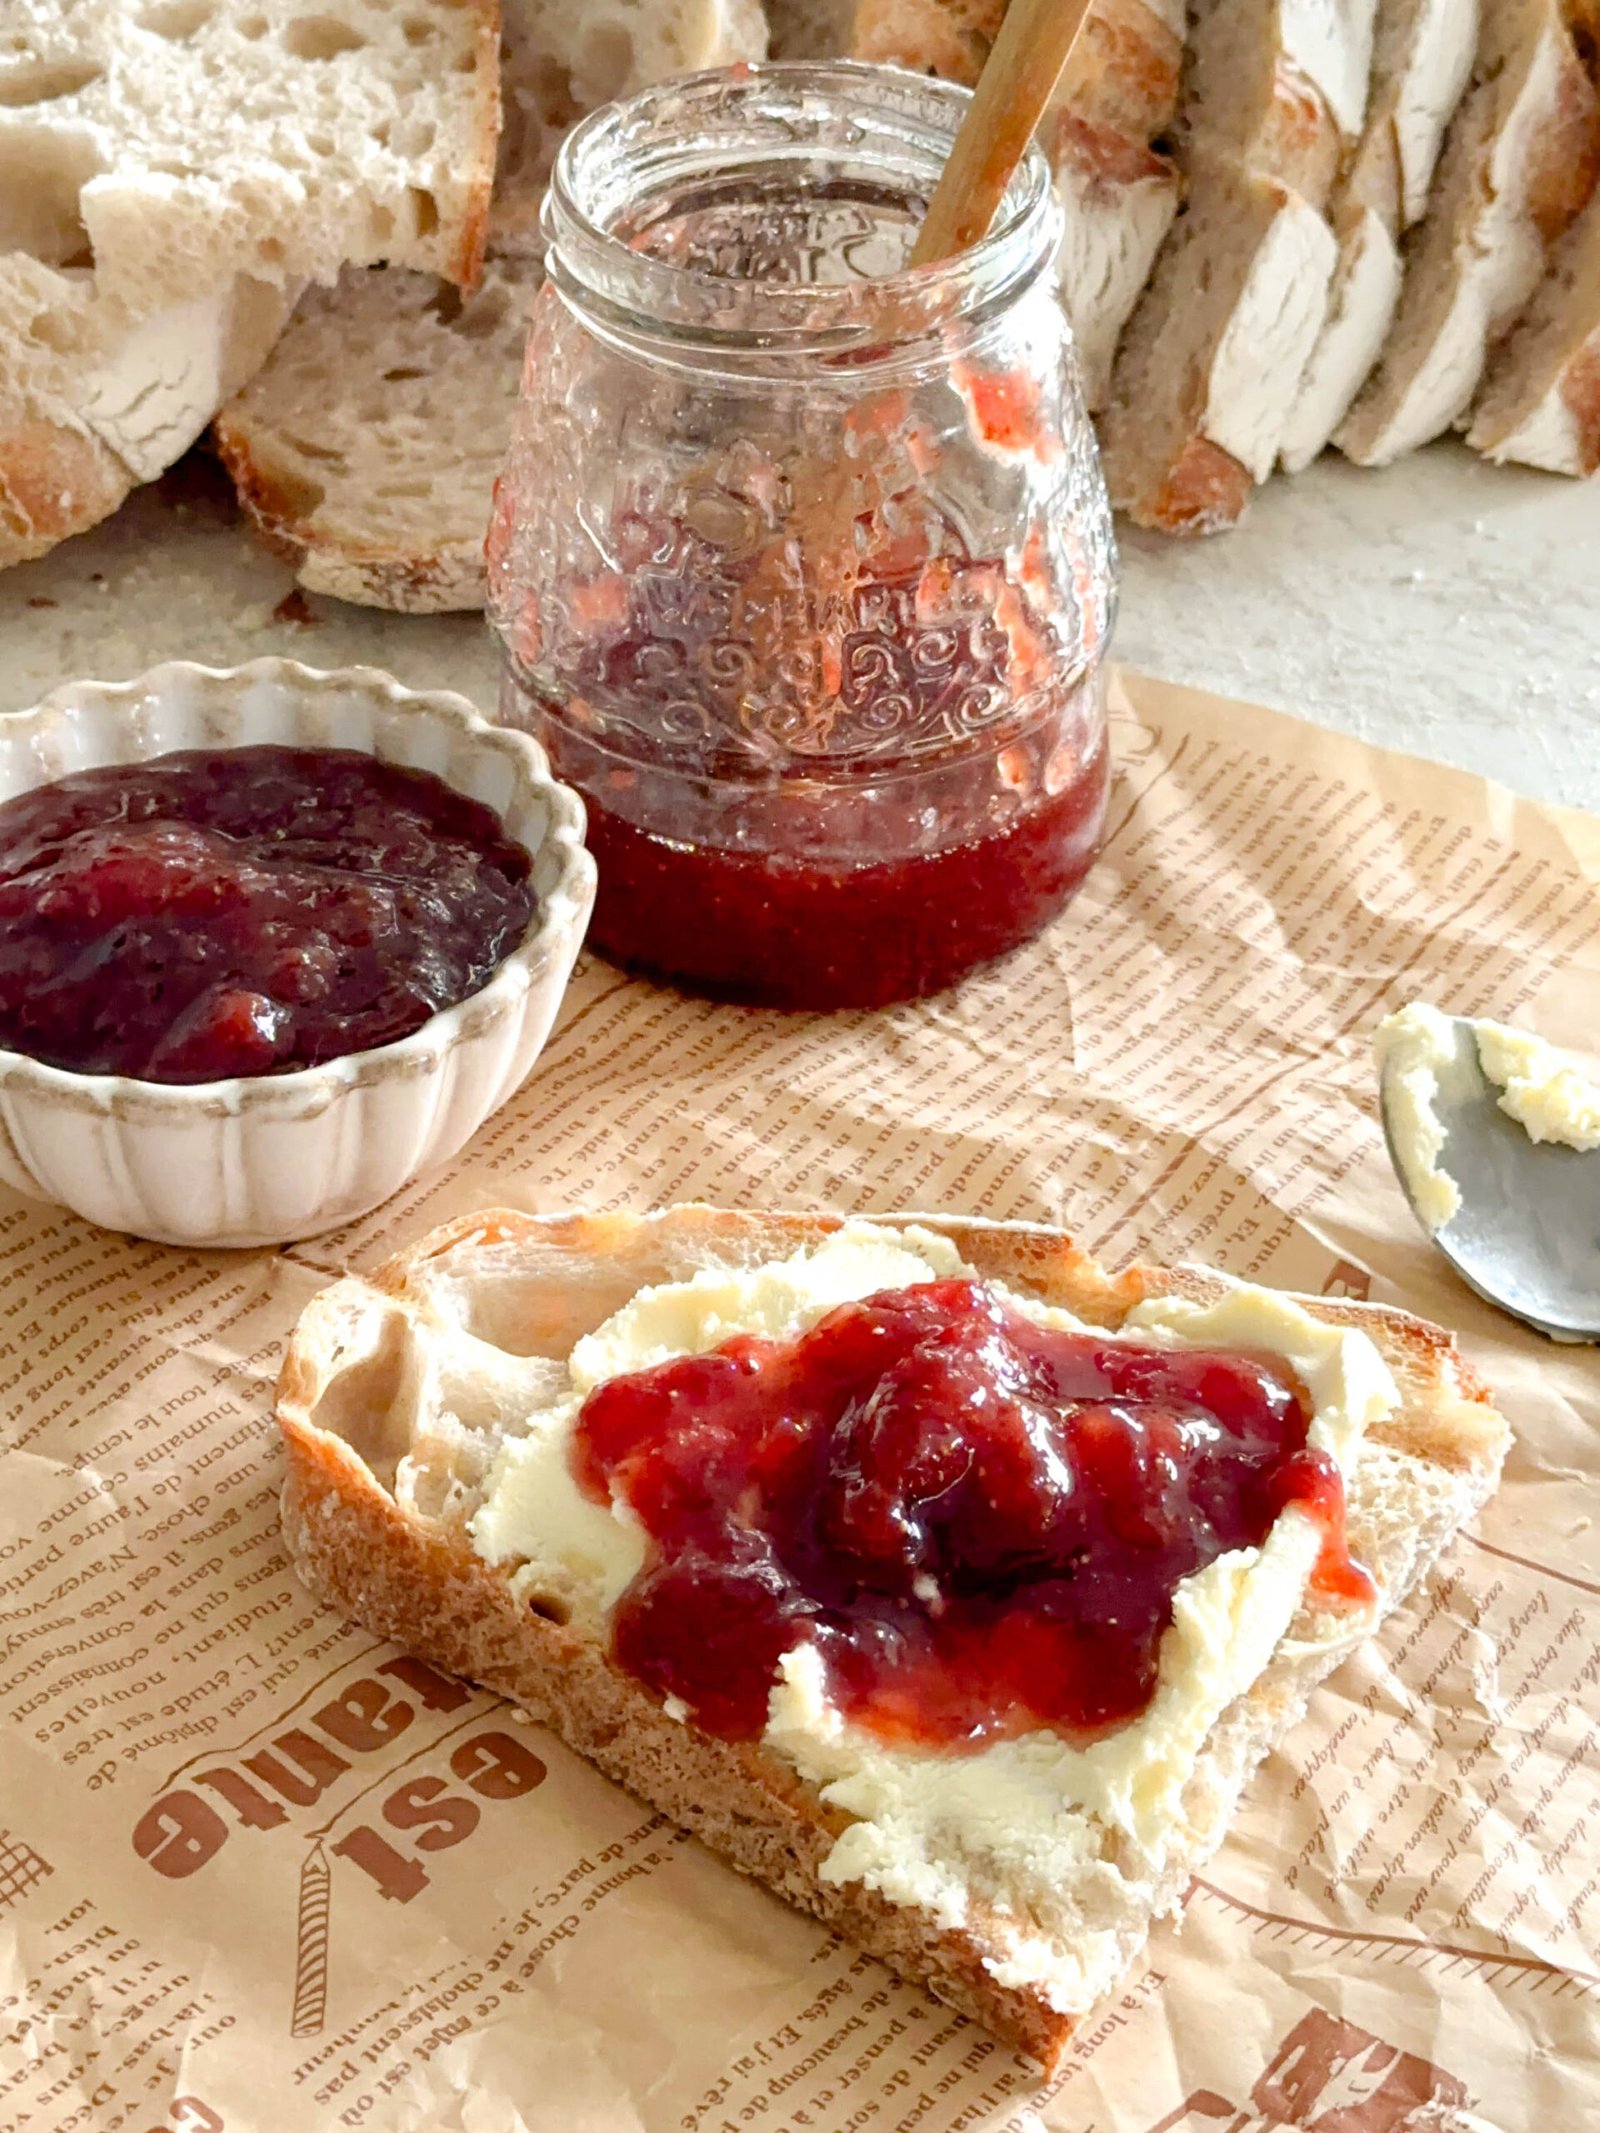
In our Turkish-Iranian household, jam is more than just a spread; it’s a staple of our breakfast table. We usually enjoy it with freshly baked bread like Barbari or Lavash, often picked up by the men in the family from local bakeries early in the morning. A dollop of Mama’s Strawberry Jam on warm bread, paired with clotted cream or butter, is a simple yet luxurious treat that starts the day off right. It’s a tradition that brings our family together and keeps us connected to our cultural roots.
The perfect Strawberry Jam Recipe
How to make strawberry jam
Now I make rather large batches of my Mama’s Strawberry Jam (3-4kg of strawberries) and store it in the fridge for most of the year but if you are new to jam making and/or trying your hand for the first time then a much smaller quantity like the measurements below may suit you best.
To make Mama’s Strawberry Jam, you’ll need:
- 4 cups of fresh strawberries, hulled and mashed
- 4 cups of granulated sugar
- 1/4 cup of lemon juice
Steps for this Strawberry Jam Recipe
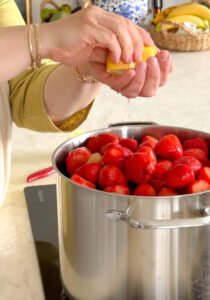
1. Prepare the Strawberries
Start by selecting the freshest, ripest strawberries you can find. Wash them thoroughly and remove the hulls. Now this is where this jam differs from the rest. My mum likes the fruit in her jam to stay as whole as possible instead of it turning out more like marmalade.
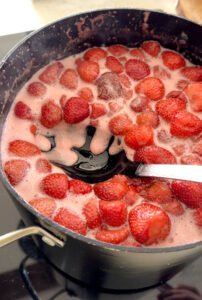
2. Cook the Jam
In a large pot, combine the whole strawberries, sugar, and lemon juice. Stir well to mix. Place the pot over medium heat and bring the mixture to a boil, stirring constantly. Once it reaches a rolling boil, let it boil for about 10 minutes, continuing to stir frequently to prevent sticking and burning.
3. To achieve a clear syrup
You will see that after it starts to come to a boil there will be white foam forming on the top. to achieve a clear syrup in your jam, remove as much of the foam as possible.
4. Test for Doneness
This strawberry jam recipe requires you to leave it on low heat to simmer for 2-3 hours until you are happy with the consistency. To test if the jam is ready, place a small plate in the freezer before you start cooking. When you think the jam is done, drop a small amount onto the chilled plate and let it sit for a minute. Push the edge with your finger; if it wrinkles, it’s ready. If not, continue boiling for a few more minutes and test again.
5. Strawberry Syrup for a refreshing summer drink
Just before the jam is done and removed off the heat, this is after 2 hours of it simmering on medium to low. If there is still a lot of liquid in the pot then its the perfect time to remove some for a drink. I take a few cups of the liquid only from the pot, strain it through a sieve and save in a glass bottle to use for drinks.
6. Jar the Jam
Carefully ladle the hot jam into sterilized jars using a funnel, leaving about 1/4 inch of headspace at the top. Wipe the rims clean with a damp cloth and screw on the lids. Process the jars in a boiling water bath for 10 minutes to ensure they are sealed properly. I don’t always have the time to do this and I have never ended up with mouldy jam. I store all my jars in a fridge up to a year.
Frequently Asked Questions
1. Can I use frozen strawberries to make this jam?
Yes, you can use frozen strawberries. Just make sure to thaw them completely and drain any excess liquid before starting the jam-making process.
2. How do I wash fresh strawberries properly?
To wash fresh strawberries, place them in a colander and rinse them under cold running water. Gently rub each berry to remove any dirt or debris. For an effective method, you can soak them in a solution of water and a teaspoon of baking soda (bicarbonate of soda) for a few minutes to help remove any pesticides or residues. Rinse thoroughly under running water and pat dry with a clean towel.
3. Can I reduce the amount of sugar in Mama’s strawberry jam recipe?
Yes, you can but reducing the sugar may affect the texture and preservation of the jam. The sugar helps with setting and acts as a preservative.
4. What is the ratio of strawberries to sugar?
The ratio is equal parts strawberries to sugar. For example, if you use 4 cups of strawberries, you should use 4 cups of sugar.
If you do make this Strawberry Jam Recipe, please take a moment to leave a review, comment or or any questions you may have.
Also tag me on Pinterest or Instagram so I can see your work of art! Not only is it my favourite thing to scroll through and see what you are all making. But it also brings me so much happiness to see my hard work is beneficial to you all 🙂
This is the best place to reach me, and I’d love to hear from you.
Love, Nelly 🙂
Recipes You Must Try
- APPLE STREUSEL HANDPIE
- CARDAMOM ROSE DATE SUHOOR OATMEAL
- KARKADE – HIBISCUS TEA
- PISTACHIO AND POMEGRANATE TURKISH DELIGHT
- 10 MINUTE CHOCOLATE DATE TRUFFLE


Mama’s Strawberry Jam
Ingredients
Instructions
-
Wash the strawberries thoroughly, remove the hull from the berries. In a large pot, combine the whole strawberries, sugar, and lemon juice. Stir well to mix. Place the pot over medium heat and bring the mixture to a boil, stirring constantly. Once it reaches a rolling boil, let it boil for about 10 minutes, continuing to stir frequently to prevent sticking and burning.
-
You will see that after it starts to come to a boil there will be white foam forming on the top. to achieve a clear syrup in your jam, remove as much of the foam as possible.
-
Leave the jam on low heat to simmer for 2-3 hours until you are happy with the consistency. To test if the jam is ready, place a small plate in the freezer before you start cooking. When you think the jam is done, drop a small amount onto the chilled plate and let it sit for a minute. Push the edge with your finger; if it wrinkles, it’s ready. If not, continue boiling for a few more minutes and test again.
-
Just before the jam is done and removed off the heat, this is after 2 hours of it simmering on medium to low. If there's too much liquid in the pot then remove some for a drink (See above).
-
Carefully ladle the hot jam into sterilized jars using a funnel, leaving about 1/4 inch of headspace at the top. Wipe the rims clean with a damp cloth and screw on the lids. Process the jars in a boiling water bath for 10 minutes to ensure they are sealed properly.

Such a warm cozy treat, perfect for this season!
Thank you 🙂